


Unless you are part of the fixed-gear revolution, or the road-disc revolution for that matter, your bike likely has rim brakes. It’s essential that the dual-pivot caliper brakes on your road bike are working properly before you head out on the road.
You must change your brake pads when you have worn them down to the “limit line.” The “limit line” is indicated on each single brake pad and represents the minimum thickness required for safe usage. Brake pads are made of different compounds for use with specific rim materials, such as carbon fibre or aluminum, so you might also need to change your brake pads if you are using different types of wheels.
First, unscrew the brake cable barrel adjuster to loosen the brake off, open the calipers using the lever and remove the wheel.

Using the 2.5 mm Allen key, unscrew the grub screw that stops the pad from sliding out. You don’t need to completely remove it, just enough to release the pad. If it’s a bit stiff, use the pliers to encourage it out.
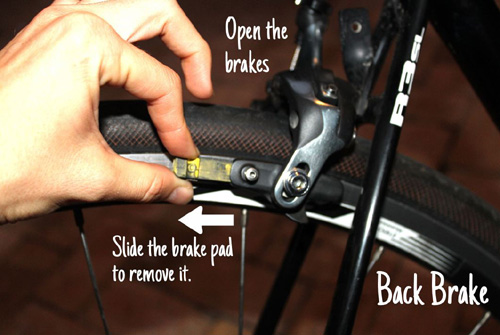
Take the new pad and check the directional arrow and the right/left indicator on it. Once you’re sure you’ve got the correct pad, slide it in.
Tighten up the grub screw and then repeat this process on the other side. When the brake shoe is mounted correctly, the capped end is always pointing forwards and the security screw is always towards the back.
Replace the wheel, close the caliper and then use the barrel adjuster to set the pad position relative to the rim. Double check that when the brakes are on, the pads don’t rub on the tyre. You can adjust their position using your 4 mm Allen key.


